Introduction #
Windows Hosting comes with Windows Reseller Hosting, Windows Small Business Hosting and Windows Dedicated Server with Plesk Control Panel. In this article, we will learn to point MX record in Plesk Control Panel. They are many features comes with Plesk Control Panel to configure your domain name with E-mail, DNS, Databases and FTP.
Prerequisites
#
1. You will require Login details for the Plesk Control Panel.
Important Notes
#
1. You should have a Domain in Plesk Control Panel.
Watch the Video
#
Procedure
#
1. Log in to your Plesk reseller account.[https://yourdomain.com:8443 or https://server-hostname:8443]
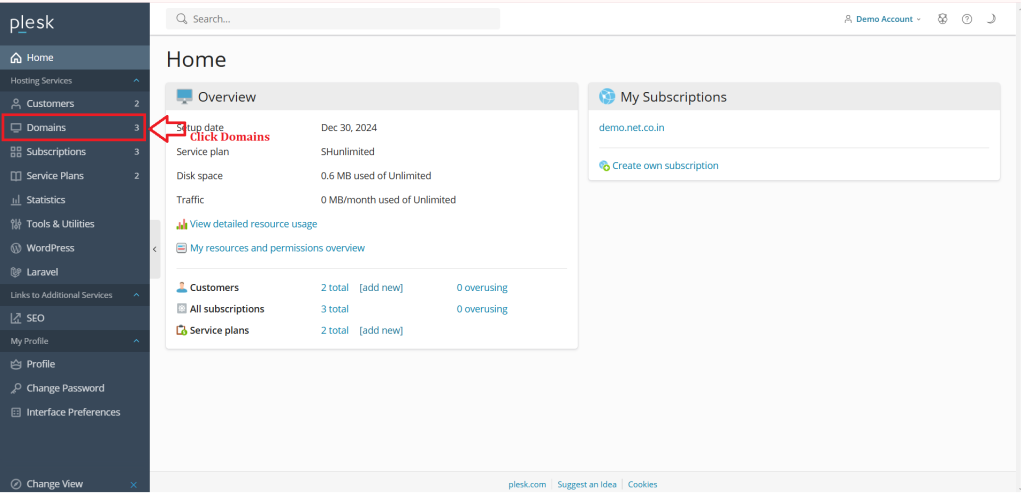
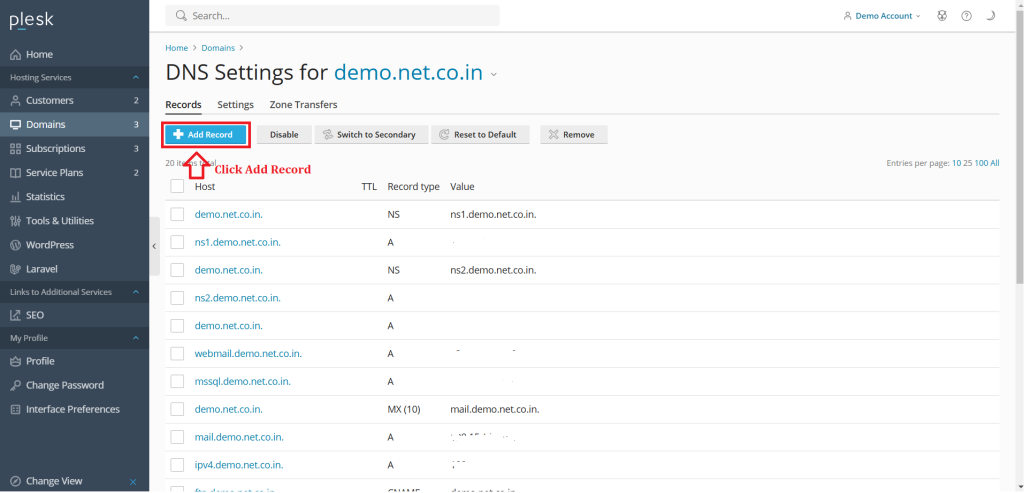
2. Navigate to the “Domains”.
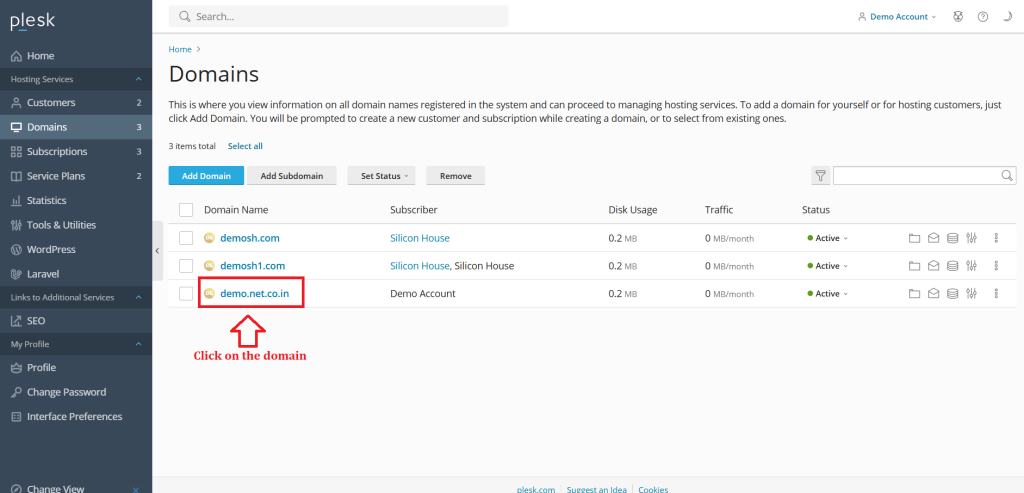
3. Select the domain for which you want to add an MX record.
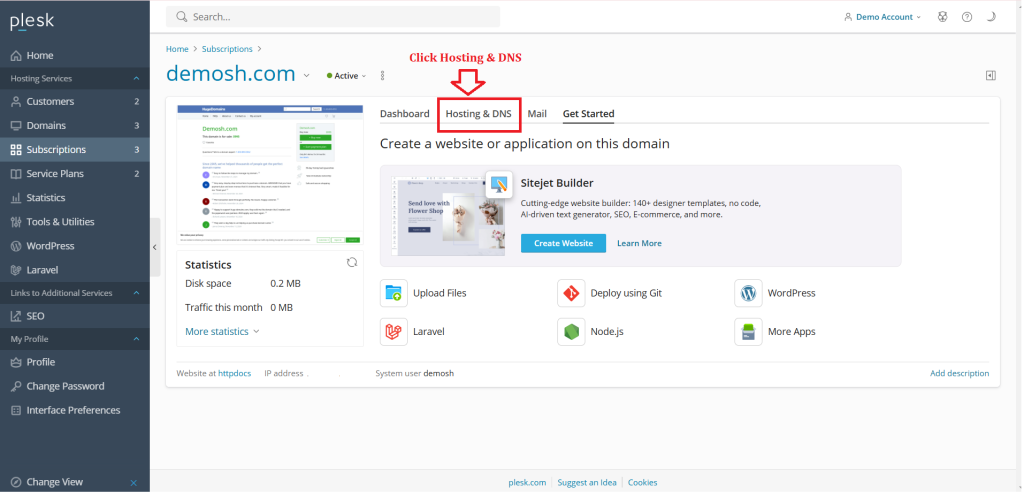
4. Go to “Hosting & DNS”.
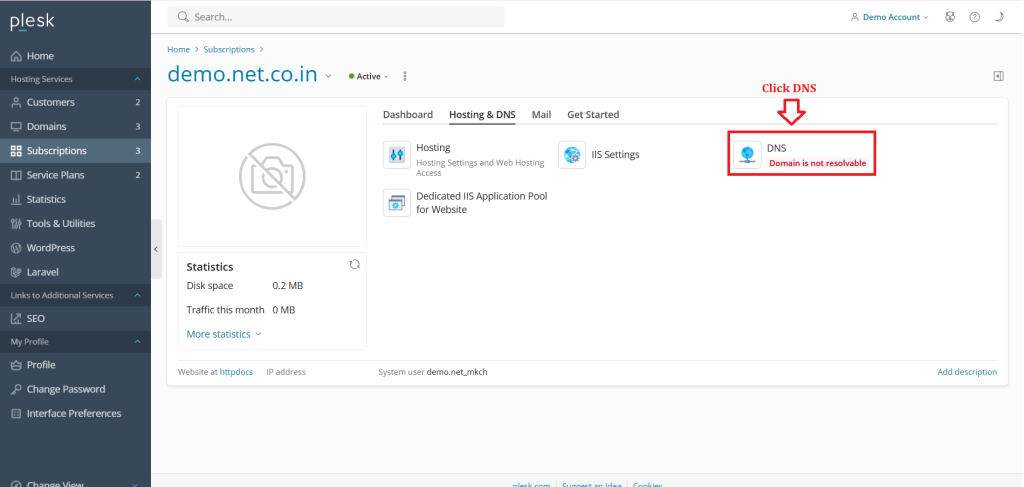
5. Click on “DNS Settings”.
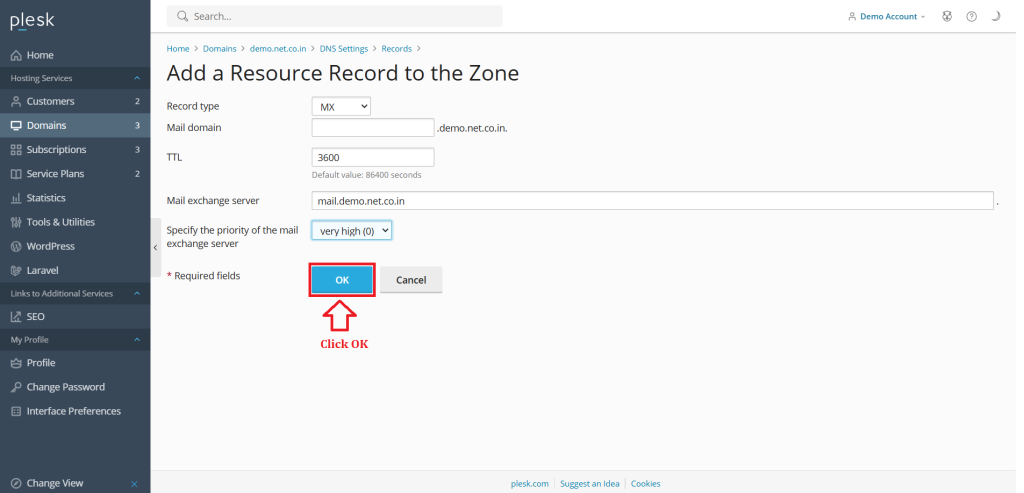
6. Click on “Add Record”.
7. In the record type drop-down menu, select “MX record.”
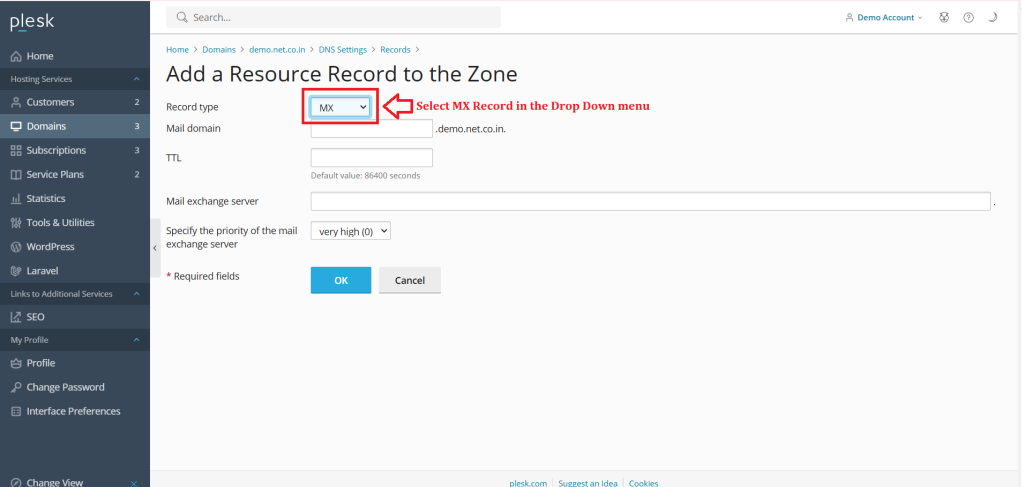
8. Leave the mail domain field empty if you’re not using subdomains for email.
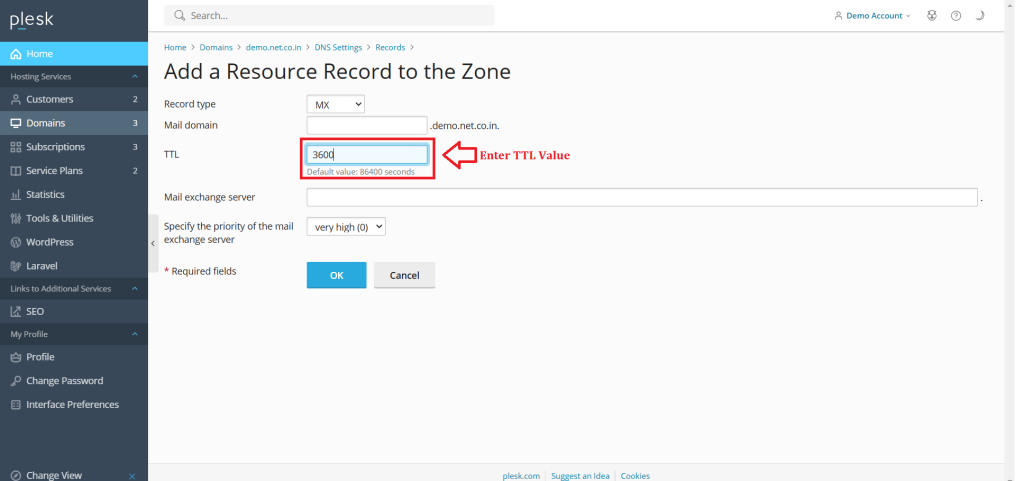
9. In the TTL (Time To Live) field, enter any value in seconds, for example, 3600.
10. In the “Mail exchange server” field, enter the mail exchange server name, such as mail.domainname.com.

11. Set the priority by selecting the appropriate value from the drop-down menu. A lower value indicates higher priority.
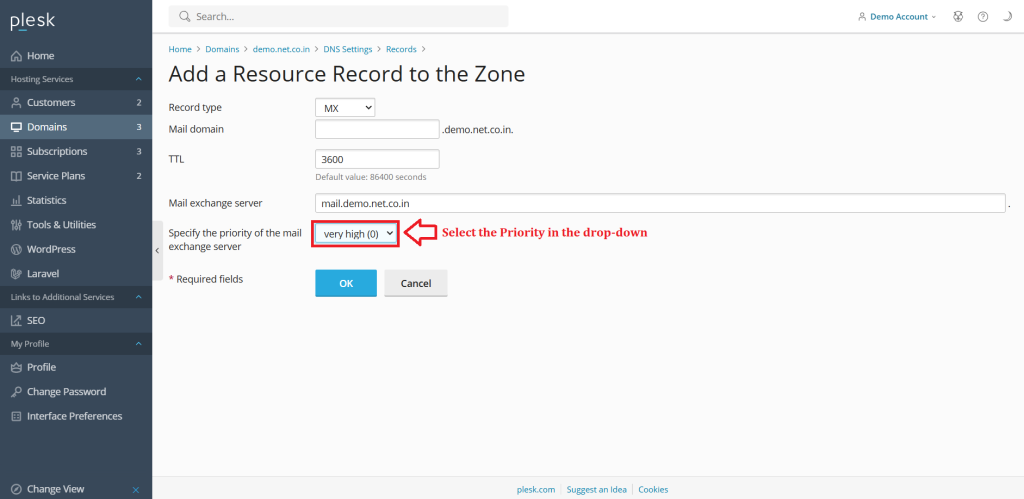
12. Click ‘OK’ to save the MX record.
Conclusion
#
We have successfully learnt to point MX record in Plesk Control Panel. They are many features comes with Plesk Control Panel to configure your domain name with E-mail, DNS, Databases and FTP. For more details about best Windows Dedicated Server in India click here.


